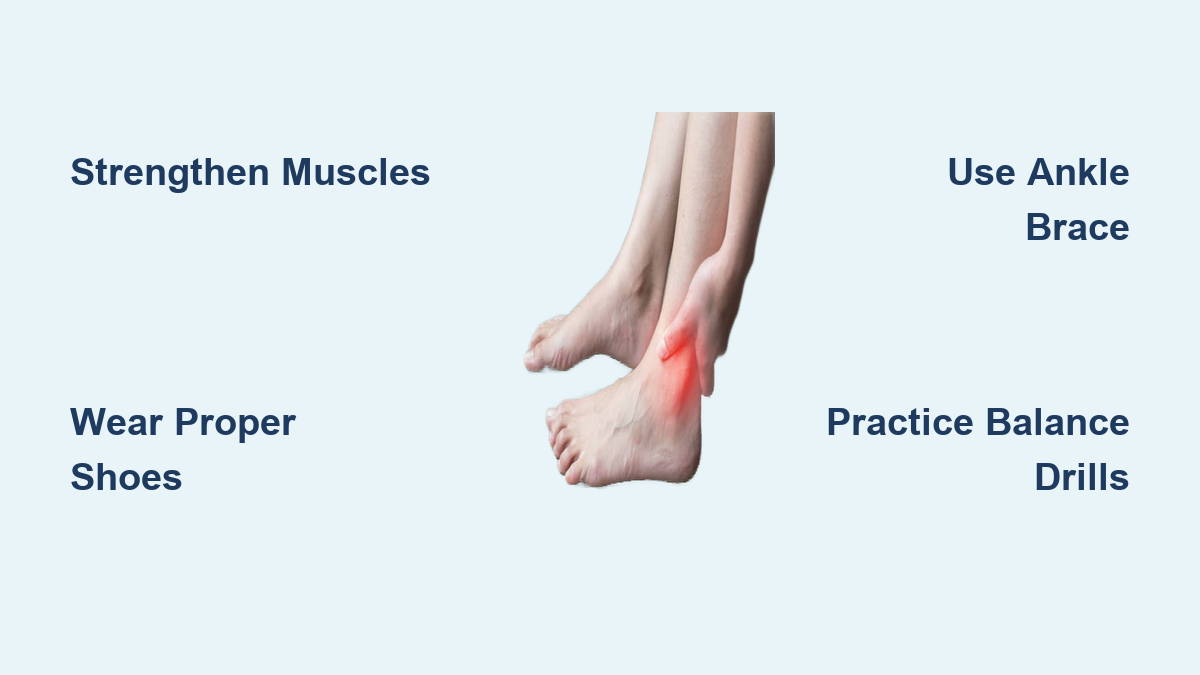
If you’ve ever felt your ankle wobble during a jump, twist on a trail, or give way while changing direction quickly, you’re not alone. Supporting weak ankles during exercise is critical for staying active, preventing injury, and building confidence in your movement. Ankle sprains are the most common sports-related musculoskeletal injury—nearly half occur during physical activity—and once you’ve sprained an ankle, your risk of re-injury jumps significantly. For athletes, fitness enthusiasts, or anyone who values mobility, proactive ankle support isn’t optional—it’s essential.
The good news? You don’t have to stop exercising because of weak ankles. With targeted strategies like strengthening exercises, proper footwear, external support, and smart recovery habits, you can stabilize your joints, reduce instability, and keep pushing your limits safely. Whether you’re recovering from a past injury, have high arches, or simply feel unsteady on your feet, this guide will show you exactly how to protect your ankles and stay strong through every workout.
Strengthen Ankles with Targeted Exercises

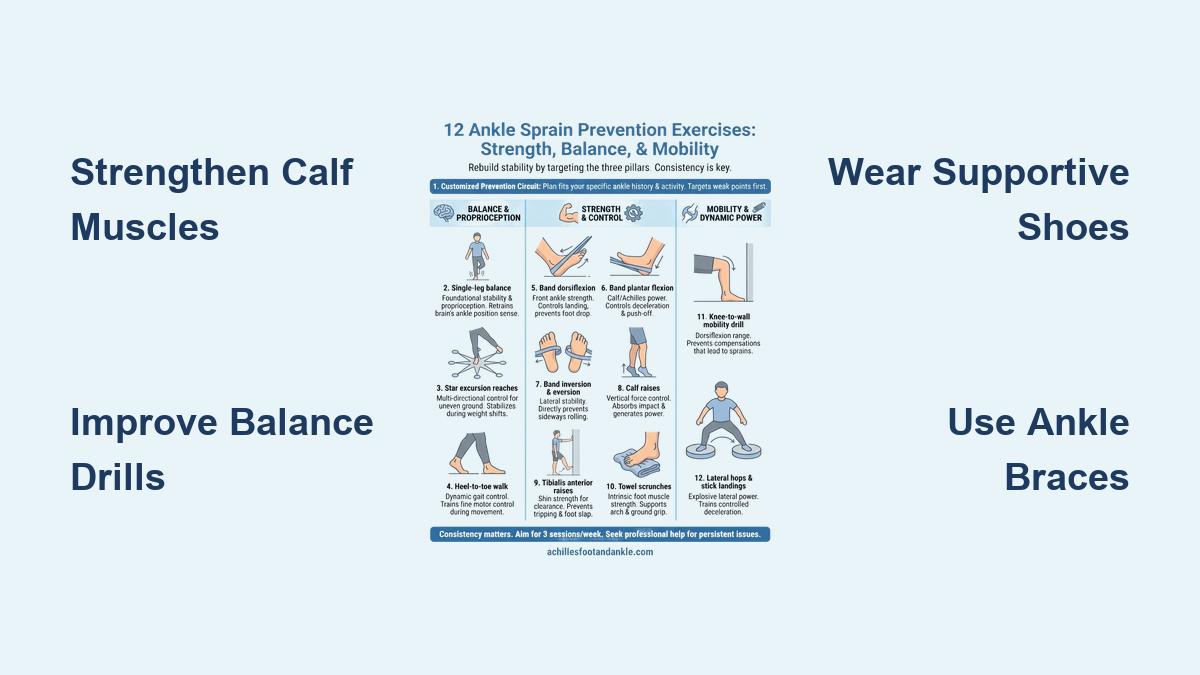
The foundation of ankle stability lies in muscle strength—especially in the peroneals and tibialis anterior. These muscles control foot movement and help prevent rolling, which is the leading cause of sprains.
Focus on the Peroneal Muscles
The peroneal muscles run along the outer calf and pull your foot outward, countering the inward roll that leads to most ankle injuries. Weakness here increases instability, especially on uneven terrain or during side-to-side movements.
Try this simple resistance band exercise:
– Sit on the floor with one leg extended.
– Loop a resistance band around the ball of your foot and anchor the other end.
– Slowly turn your foot outward against the tension.
– Complete 3 sets of 15 reps on each side, 3 times a week.
This builds endurance and control, improving your ability to react during sudden shifts in balance.
Add Balance and Proprioception Training
Proprioception—your body’s awareness of joint position—is often impaired after an ankle injury. Retraining it reduces the delay in muscle response when your foot starts to roll.
Begin with single-leg stands:
– Stand barefoot on one foot for 30 seconds.
– Progress by closing your eyes or standing on a foam pad or balance disc.
– Perform daily to sharpen neuromuscular coordination.
Pro tip: If you’ve had repeated sprains, your brain may not signal your muscles fast enough to correct a misstep. Balance drills rewire that reflex over time.
Choose the Right Footwear for Your Arch Type

Wearing unsupportive shoes is one of the fastest ways to strain weak ankles. Your foot structure determines how forces travel up your leg—and mismatched footwear can increase sprain risk.
High Arches Increase Sprain Risk
People with high-arched (cavus) feet are more prone to ankle sprains because their weight shifts laterally, making them more likely to roll outward. These feet also absorb less shock, increasing joint stress.
Choose shoes with:
– Firm midsole support to resist collapse
– Lateral stability features (like dual-density foam)
– Cushioning to reduce impact during running or jumping
Avoid minimalist or overly flexible models—they lack the structure high arches need.
Replace Worn-Out Shoes Regularly
Even high-quality athletic shoes lose support after 300–500 miles of use—about 6 months for regular exercisers.
Check for red flags:
– Flattened midsole cushioning
– Uneven sole wear (especially on the outer edge)
– Shoes that tilt when placed on a flat surface
Warning: Worn shoes compromise ankle alignment and increase instability. Replace them proactively, not reactively.
Use Supportive or Custom Insoles
Over-the-counter orthotics can help, but for persistent issues, custom insoles offer superior alignment. Made from molds of your feet, they correct biomechanical imbalances that strain the ankle.
Ask your physical therapist or podiatrist about:
– Rigid or semi-rigid orthotics for overpronation
– Lateral heel wedges to stabilize high-arched feet
– Arch supports tailored to your foot shape
These inserts distribute pressure evenly, reducing strain on ligaments and tendons.
Use Ankle Braces for Extra Stability

When strength and shoes aren’t enough, external support can make a real difference—especially in high-risk sports or post-injury recovery.
Choose the Right Type of Ankle Brace
Not all braces are equal. Match the support level to your activity.
Lace-up braces:
– Offer compression and medial/lateral support
– Allow full up-and-down motion while limiting side-to-side roll
– Ideal for basketball, tennis, or trail running
Sleeve-style braces with stays:
– Slip on easily; include plastic or metal supports on both sides
– Provide mild to moderate protection
– Great for gym workouts or hiking
Hinged braces (post-injury):
– Deliver maximum stability with rigid sides
– Used under medical supervision for chronic instability
– Often prescribed after repeated sprains
Note: Braces are slightly more effective than taping and last longer—though they cost more upfront.
When to Wear a Brace
Consider using a brace if you:
– Have a history of ankle sprains
– Play sports involving cutting, jumping, or pivoting
– Feel your ankle “give way” during movement
– Are returning to activity after an injury
Wear it during exercise only—avoid all-day use to prevent muscle weakening from over-reliance.
Tape Your Ankles for High-Intensity Sports
Athletic taping provides short-term, competition-day support. It’s popular among basketball players, dancers, and soccer athletes who need extra protection during games.
Learn Proper Taping Technique
Incorrect taping can restrict blood flow or fail to prevent injury. Use zinc oxide tape for rigid support or kinesiology tape for dynamic movement assistance.
Basic preventive taping steps:
1. Clean and dry the skin; apply pre-wrap to prevent irritation.
2. Place anchor strips above and below the ankle.
3. Apply stirrup strips from the outside of the foot, under the arch, and up the inside.
4. Wrap a figure-eight pattern around the ankle and heel.
5. Finish with closure strips to secure everything.
Pro tip: Tape before intense games or practices, not daily workouts. Prolonged use can cause skin damage or reduced circulation.
Compare Taping vs. Bracing
| Feature | Taping | Bracing |
|---|---|---|
| Cost | Lower per use | Higher initial cost |
| Support | Moderate (loosens over time) | Consistent throughout workout |
| Durability | Loses tension in 15–30 minutes | Lasts entire session |
| Reusability | Single use | Reusable |
| Ease of use | Requires skill | Easy to apply |
For daily training, braces win. For competition, taping offers lightweight, snug support.
Listen to Pain—Don’t Ignore Warning Signs
Pain is not normal. It’s your body’s alarm system. Ignoring discomfort increases the risk of long-term damage.
Know the Difference: Fatigue vs. Injury
Muscle fatigue fades with rest. But sharp pain, swelling, or instability may indicate:
– A Grade 1 sprain (stretched ligament)
– A Grade 2 sprain (partially torn)
– Or worse—a fracture or chronic instability requiring medical care
If you can’t bear weight or swelling appears quickly, seek evaluation immediately.
Follow the R.I.C.E. Protocol
For minor tweaks:
– Rest: Stop activity to avoid further damage.
– Ice: Apply for 15–20 minutes every 2–3 hours.
– Compression: Use an elastic bandage or sleeve.
– Elevation: Keep your foot above heart level to reduce swelling.
Warning: Returning too soon triples re-injury risk. Let pain guide your timeline.
Rehab After a Sprain to Prevent Recurrence
Up to 40% of people develop chronic ankle instability after one sprain—often because rehab was incomplete.
Start Physical Therapy Early
A physical therapist can guide you through:
– Range-of-motion exercises
– Strengthening drills
– Balance and agility work
– Sport-specific movements
Even 1–2 sessions can teach you the right techniques to rebuild safely.
Don’t Skip the Full Rehab Process
Many stop when pain disappears—but ligaments remain loose, and proprioception lags behind. A full recovery includes:
– Week 1: Reduce swelling and restore motion
– Week 2–3: Build strength and balance
– Week 4+: Gradually return to sport with support
Completing rehab lowers re-injury risk and restores confidence in your ankle.
Prevent Future Injuries with Smart Habits
Supporting weak ankles is an ongoing process—not a one-time fix.
Warm Up Before Exercise
Cold muscles react slower. Always warm up for 5–10 minutes with:
– Light cardio (jogging, jumping jacks)
– Dynamic stretches (ankle circles, leg swings)
– Movement-specific drills
This primes your nervous system and improves joint responsiveness.
Avoid High-Risk Surfaces When Possible
Uneven ground, wet courts, or loose gravel raise sprain risk. If you’re prone to rolling:
– Stick to flat, dry surfaces
– Inspect trails before hiking
– Wait for courts to dry after rain
Cross-Train to Build Full-Leg Strength
Strong hips and knees improve control over foot motion. Include:
– Squats and lunges
– Step-ups
– Clamshells (for hip abductors)
Better whole-body mechanics mean less strain on your ankles.
Final Note: Supporting weak ankles during exercise isn’t just about avoiding injury—it’s about moving with confidence. By strengthening key muscles, wearing supportive footwear, using braces when needed, and listening to your body, you can stay active without fear. Start small: add balance drills to your routine or replace worn shoes. Over time, these habits build long-term resilience. Your ankles—and your active lifestyle—will thank you.